
Materials used:
- butterfly pattern
- silver plated metal sheet 0,4 mm width (24 gauge)
- a pair of scissors for metal
- jewelers hammer and anvil
- grinding tools
- one bead ( i am using a 6 mm amethyst round bead)
- silver plated wire 0,6 mm width (22 gauge), 30 cm long
- 2 silver plated headpins
STEP 1:
Cut the butterfly pattern.

STEP 2:
Draw the outline using a pencil on the metal sheet.

STEP 3:
Cut the outline using your pair of scissors. The metal sheet i am using is quite thin so you can use a sewing pair of scissors as well!

Here is the butterfly. Now we must make it smooth and decorate it!

STEP 4:
Use your hammer to smooth the edges in case they are quite curved from the scissors.

STEP 5:
Use your grinding tools to smooth the edges. I am using the hard grinding tip here.
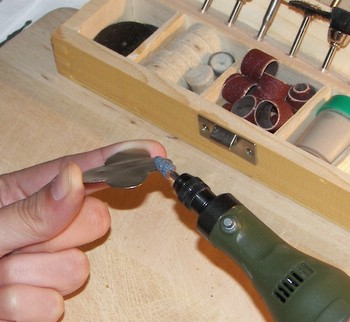
STEP 6:
Using your cup wire brush, grind all the surface to make it shine! In the picture i've done only half of the butterfly, just to show you the difference.
 STEP 7:
Use your cup nylon bristle brush or the felt wheel, to clean the surface.

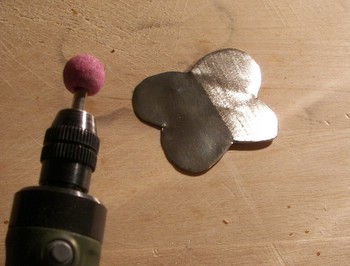
STEP 8:
If you don't like it shiny but you prefer your butterfly with a relief texture you can use the pink sanding round tip. Here is a picture where the right half of the butterfly is textured for demonstration reasons.
STEP 9:
Your butterfly is now ready. You can decorate is as you like. Here is what i've done...
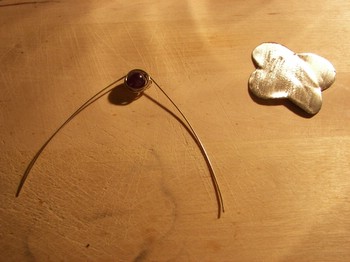
Take your bead and the long piece of silver plated wire. Place the bead through the hole in the middle of the wire and wrap the wire around the bead twice, to keep it in place.
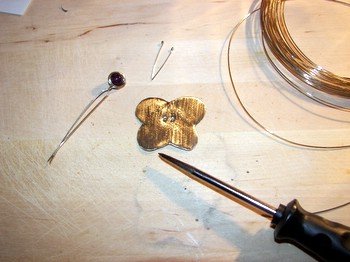
Make two small holes in the middle of the butterfly.
Place the bead and the wire on the butterfly, in the middle to make the body.
To keep the bead and wire in place, use the small piece of wire, put it through the holes and secure at the back.
You can now make the two wires of the bead curly by wrapping them around a pen.
For the antennas use two headpins and secure them at the back with glue or by soldering.
You are done!
- you can stick a safety brooch pin at the back, and make it a butterfly brooch
- you can make a hole, place a jump ring, and make it a pendant
- you can stick a hair barrette at the back, and put it on your hair
- it can be used as an embellishment for scrapbook or card making
... and many many more you can think of!
I hope you like it! Feel free to ask me any questions or leave a comment!
